Saturday, June 29, 2013

Embroidery Project for the Day (or Two)

I have this pair of hand-me-down cropped jeans that I didn't think I liked, but now I love. Trouble is, they are the fake-ripped-up style, not too bad, but every time I wash them, I'm thinking that any moment they're going to become the ACTUAL ripped-up style. So I started out by taking an old pillowcase and cutting up patches and ironing them onto the wrong side with Stitch Witchery. I made a few reinforcing stitches around the edges, then I decided I should have some fun with it. So I started embroidering:
The middle, solid part is a piece of corded trim, embellished with some iridescent white delica glass beads. Then the embroidery was done in double-stranded white tatting thread (didn't actually have any embroidery floss in white, wasn't going to let that stop me), and the center jewels are iron on gems. Once I got that far, I thought it needed a few extra little bits, so I started looking up embroidery stitches on the web (since I haven't done this since I was a kid). That's where I happened upon this instructional video of Wendy from Knitter's Brewing (socalknitgirl on YouTube):


Her instructions are clear and easy to follow, plus her nails look fabulous! I started watching so that I could add a few little French knots to the design, and I wound up watching the whole thing, and now I want to try doing a bullion rose or two someplace else on the jeans! I'll post pictures of my results!
If you are a knitter, Wendy has a whole channel on YouTube full of vids for knitters! Check them out--they've got to be good!

Tuesday, March 26, 2013

An American Girl's Interpretation of Venezuelan Pabellon Criollo

When I was a Senior in college at what is now St. Andrews University, I got to go to Venezuela for a month during our January term. It was technically a class in Marine Biology, and I was a Chemistry Major. I'd love to say that I had the absolute time of my life, especially since I saved up all my summer money to go on this trip, but in the end, it was just okay. I had wanted to go so badly because so many of my friends were Biology majors and they had gone in years past and had the time of their lives. They were all friends beforehand, so they had gotten to go as a bunch of friends. My problem was that all of my friends had already gone in years past, so the folks I went with I can barely remember the names of to this day. But I made the best of it, got to enjoy someone else's culture, music, lifestyle, and food.
The food was probably the best part. We stayed in a small town and rented out their houses and went to the local restaurant for all of our meals. We had Cafe con Leche with breakfast (probably instant coffee, but it was damn good, nonetheless), white bread toast (I hate white bread, but this stuff was great), and arepas (little cornmeal fried patties with butter). Lunch would be any old thing, but after going out into the icy cold water all morning, tasted mighty good. Dinners were often chicken (especially tasty thinking it might have been the one that woke us up that morning) with more arepas, fried plantains (starchy banana-like thing), and lots of black beans and white rice. For special occasions, we'd have our black beans and rice with this amazing slow-cooked beef. I still feel like I remember the taste, but have never really come across a recipe that really did it justice.
Someone else's picture: Served like this (with plantains) I'm told is called Pabellon con Barandas, where baranda means "guard rail"; so the plantains are there to keep the rest of the food from falling off the plate!
Then the other day, I was in the nail salon waiting, and I started talking to the woman next to me. As it turns out, she was Venezuelan, so I told her how I had gotten to go there twenty-some years ago and what a lovely country it was (despite my own youthful angst, it was a lovely country). Then I asked her about that beef, as it is considered by many to be the national dish of Venezuela. Never having learned Spanish, I could never remember the name of it, which she reminded me, was Pabellon Criollo (I'd like to say I remembered that name until I sat down here, but, no, I still had to go look it up). She told me it was simply onions, garlic and peppers (mostly sweet peppers, not spicy), then you brown the beef and stew it for a long time and eat it with black beans and rice.
When I got home, I was inspired. I got out my new obsession, the Slow Cooker, and defrosted some stew beef, threw in some Knorr Homestyle Stock, some carrots, garlic, a little squeeze of agave syrup for sweetness, some Bueno Autumn Roast Green Chile, and two cans of black beans (I don't care how easy you try and make it, I hate preparing dried beans.). While the original dish keeps the beans and meat separate, I decided to slow-cook them together so that the beans would sauce up the stew and all the flavors would meld together.  All in all, I think I did a pretty good job of reproducing the flavor I remember. Mine was spicy, though, whereas the original was not; nonetheless, I wanted that pepper taste to it, so I made the concession. I suppose if you wanted to, you could simply substitute mild green chile or even fry up some sweet bell peppers with some onion instead. I have excluded the onion from my recipe as my husband doesn't care for it--I could hardly tell the difference.
Since this is now my second try, I thought I'd record it this time!
What mine looks like so far--it's only been cooking for a couple hours.

Pabellon Criollo

1 lb. (or more) stew beef, cut into cubes
1 pod Knorr Homestyle Stock--Beef
2 cups (or so, if more beef is used) hot/boiling water
3 carrots, cut into bite-sized chunks
3/4 c. Bueno Autumn Roast Green Chile (or peppers of your choice)
1 clove garlic, minced
1 bay leaf
2 - 15 oz. cans black beans
2 T agave syrup
pepper to taste

Note: While most recipes would have you salt the beef, the Knorr stock is salty enough, so I let it go. Please check the taste before you go adding any salt to it.

Place the beef chunks into the bottom of the Slow Cooker. Dissolve the pod of Knorr stock in 2 cups or so of boiling water (this is less water than is recommended by Knorr, but the Slow Cooker doesn't allow for much evaporation, so I started with less liquid). Add the carrots to the Slow Cooker, then pour the stock over it all, which will allow you to judge if you have enough liquid so far to cover the ingredients. Add all the remaining ingredients. I added the black beans last in order to judge whether I should drain any of the liquid out. Overall, you should have enough liquid to cover everything, but not so much that it's all swimming.
Cook on low for 8 to 10 hours. If desired, towards the end of the cooking time, use a slotted spoon to remove the pieces of meat, let them cool a little, then shred them with your fingers. Add the shredded meat back in for at least a half hour or so.
If you get into a crunch for time, or don't get started on it until late morning, cook on low for 4 or 5 hours, then crank it up to high for a couple more hours. The meat might not be as meltingly tender, but that's when I'd recommend the shredding especially, as it breaks it up and allows the meat to soften for the last little bit of cooking time.
Serve it with white or brown rice of your choice.  I suppose if you wanted to make it a little Peruvian, you could serve it with quinoa instead!
Please let me know how it turns out!


Friday, January 18, 2013

Not Just a Word Nerd--A Word Warrior!

I'm not sure if anyone has noticed from reading this blog, but I'm a little wordy. Chalk it up to having a Ph.D.,  being the child and grandchild of journalists, and carrying the spelling and grammatical correctness gene. I may take some liberties here on my blog because A) it's my damn blog, and 2) nobody reads it anyway. I suppose, like every other blogger, I just like to see my own thoughts and ideas spewed out there for all to see and criticize, yet, unlike every other blogger, I realistically understand that nobody cares. Nobody is going to pay me for my opinion, no matter how profound.
Something I do get inexplicably paid to do is edit and proofread other people's writing. I work for a fine online editing company called Scribendi. People from all over the world send in their documents to be edited--everything from poetry to graduate dissertations to just about any other written thing you can think of. I have personally edited self-published books, textbooks, scientific papers, song lyrics, resumes, and much, much more. I've had the privilege of reading some fascinating work and making sure the message got through, as well as the burden of trying to make dreadful things readable. The coolest part, I think, is that I got such a nice gig despite having any sort of degree in writing or English (my Bachelor's is in Chemistry, my Ph.D. is in Biochemistry). I actually demonstrated my skills and got hired based on that--cool, huh?
So, as a confirmed Word Nerd (sorry, Word Warrior) and Ultimate Nitpicker, I salute the fine folks at Scribendi, and repost this adorable video they have created in order to get more work for their existing editors, and perhaps recruit some new editors! Word Warriors Unite!
My only criticism is that there are far too many trees in the "shootout" scene for it to be authentically Wild West-style. Since the company headquarters is in Chatham, Ontario, I understand they had to work with what they had, but next time, you guys are all invited down to Albuquerque, New Mexico, to shoot your shootout!  We've got tumbleweeds and desert and dust--it's so dry and brown here, you won't even have to sepia-tint it later!  It's not THAT long of a drive...is it?

Sunday, January 13, 2013

Fume-Free Cleaning (If You Don't Count Cussing)

I don't know what the water quality is like where you live, but here in Albuquerque, New Mexico, we have exceedingly HARD water. In fact, I never fully appreciated the very definition of hard water until I moved here. Calcified water deposits get all over everything and never come off. As in never. As in, every couple of years, I simply THROW OUT my steam iron because it gets so clogged with hard water chunks it randomly spews them onto my husband's shirts, and no amount of country wisdom seems to be adequate to clean it.
This being said, today I walked into our family bathroom and decided (mostly since I'm getting over a cold and can't smell the fumes) I would clean the stains from the sink and toilet. To give you an idea of what I started out with, here's my less-than-a-year-old toilet:
New toilet: A whole 'nother DIY adventure I shan't trouble you with.
As well as my old-as-the-house-itself (about 35 years old) marble/something bathroom sink:
Yikes.

 No, really, the stains on the sink just look like a little grubby dirt, but they are, in actual fact, now part of the rock itself:
Oh, and I took these pictures after scrubbing it with steel wool and Comet powder for 20 minutes.
 So because I had already tried traditional cleansers and elbow grease, I thought I'd take a step back and consult that repository of all human knowledge (no, not Wikipedia; the other repository of all human knowledge) Pinterest. Now, for anyone out there reading this who is not a bored homemaker or gay man, Pinterest is a highly addictive social media site where one can go to find clever snapshots with links to recipes, pictures of other people's pets, cat memes, helpful hints, and pretty much anything one can imagine to enable the reader to waste time in the guise of compiling useful information.  Among the multitudes of helpful posts about how to clean everything in the world using common household goods are more than a few variations on the wonders of baking soda, hydrogen peroxide, and white vinegar. I started out with the simplest suggestion, mixing a paste of baking soda and peroxide and slathered this all over my target areas:
Mmmmm...pasty.
For the toilet, I got all the water out of the bowl first. If you've never had to fix your own toilet, how you do that is to turn off the water behind the tank, flush a couple of times until the tank is mostly empty, then scoop, bail, or sponge out the water in the bowl.  I needed that icky brown ring to be dryish, so the paste wouldn't all just slide down to Goldfish Heaven.  I let it sit (read, went back to look at pictures of dogs on Pinterest) then went back and started scrubbing, first, with a scrubby sponge, then with damn steel wool (the chemist in me saw this part as folly, as steel wool is probably pretty reactive with peroxide and/or bicarbonate), and after about ten more minutes of hard scrubbing, started to see the tiniest little bits of toilet ring coming off.
F**K THIS, I thought to myself, and also out loud, but without the asterisks. Then I figured out what the missing element from all of these helpful hints was. 
THIS IS THE CLEVER BIT. IF YOU DON'T LIKE IT, FEEL FREE TO GO BACK TO PINTEREST.
But seriously, it worked, so, there's that. 
Once you've got your paste all soaked in and scrubbed up to no avail, get out your reading glasses and an X-Acto knife, and scrape it off by hand. 
The clever bit.
Here's my breathtaking before and after pic; I bet you can hardly believe it's the same potty:
It has been five minutes, so it undoubtedly no longer looks like this.
Now the sink seemed to be another, wholly less satisfying matter. I pasted, I scrubbed, and I X-Acto-scraped, but that nonsense just wasn't coming off of there.  Plus, if you compare before and after (below), you'll notice that the rim around the sink isn't just dark because it's in shadows, but because it is the most stained of any of it. So one last internet tip to go--I doused it all (enough to wet the paste, but not wash it away) in white vinegar. For those of you who have forgotten, here's what I just did (excluding the peroxide, which I figured called it quits a while ago):
CH3COOH + NaHCO3 ===> NaCH3COO + H2CO3
Sodium bicarbonate and acetic acid react to form sodium acetate salt and carbonic acid. Carbonic acid is the weak acid in soda pop, which quickly breaks down into carbon dioxide and water.
H2CO3 ===> CO2 + H2O
Sorry, the chemist in me had to share that part with you. Just pretend like you already knew it.  
So, as much as I'd like to say that this reaction enabled me to simply wipe off the hard water stains with the side of my hand, there was still some more X-Acto knife action, plus a little bit of paint-scraper work after that, but at least it came off. 
Still not good as new, but certainly much better.  Don't know what that stain is in the drain, but it should be the part of the house that survives the nuclear apocalypse (are we still having that?).
 I hope that all three of my blog readers found that helpful, and I certainly feel as if I've gotten it off of my chest, which is, after all, the primary purpose of having a blog.
Not to let you think that my efforts went unnoticed, I was under the constant supervision and unwavering moral support of my entire family.
Not shown: Actual unwavering support.

Tuesday, June 5, 2012

Sexy, Healthy Food Porn!

One way to get skinny...
A few nights ago, my husband and I were supposed to go to a cookout with some friends after he finished golf, so I got sort of gussied up (in a cookout kind of way) and was all ready by the time he told me he'd be done. Well due to some unforeseen circumstances, he wound up being quite a bit later than the time he had said. Since it was too late to head out to our friends' house, we decided to go out to eat.  We picked Zio's Italian Kitchen, and it was a lovely dinner. He had the traditional spaghetti dinner, and I had a nice chicken dish with angel hair pasta. Knowing that this meal was flying in the face of my diet, I ate all the chicken and veggies, and left about a cupful of pasta behind. When I got home, I looked it up, since Zio's is a franchise, and the nutritional info was listed on their website. Even having left a bunch of pasta behind, I still estimated that I had consumed about 900 calories and over 80 grams of fat in that one meal! What a disaster for my diet! (It was still yummy, though.)
So in an effort to know what I'm eating and keeping better track of my nutrition, I've been trying to cook for all of us as much as possible. I've been making big batches of breakfast food and tracking all of the ingredients. I've made massive amounts of French toast, oatmeal (I prefer Coach's Oats) and quinoa hot cereal, and more scrambled, mostly whites, eggs than you can imagine.  Today I made another big batch of breakfast, and this one is fast becoming my favorite.  Breakfast Strata.  Think omelet + toast + whatever you want to throw in there, all in one pan.  Here's the result:
Sorry I forgot to take the picture when it first came out of the oven, but this gives you the idea. My only bit of disappointment was that, despite the nonstick pan AND olive oil spray, it still stuck to the pan like crazy!  But that was only a minor bummer, as this thing turned out utterly delicious.
Keys to the healthy success of this meal include:

  • Nature's Own Double Fiber bread (since the bread soaks up the egg anyway, you can hardly even tell there's bread in it)
  • Half whole eggs, half whites
  • Reduced Fat Sharp Cheddar Cheese
  • Dash of nutmeg (if you think it sounds weird, just trust me, you'll be hooked for life)
Here's the full-out recipe:
16 eggs, half whole, half whites only
1 cup nonfat milk
1/4 teaspoon onion powder
1 Tablespoon (or so) dried basil
1 teaspoon dried oregano
a couple generous shakes of nutmeg (so like, 1/4 teaspoon, maybe?)
salt and freshly ground black pepper to taste
8 slices of wheat bread (I used Nature's Own Double Fiber bread), toasted
7 or 8 slices of turkey bacon, cooked
1 frozen brick of spinach, thawed and squeezed dry
8 oz reduced fat sharp cheddar cheese, shredded

Preheat oven to 350 degrees F. Cook up the bacon, blot the grease off in a paper towel, and set aside.  In a large mixing bowl, crack your whole eggs, separate your whites, and make sure the dogs appreciate that they are getting the yolks. Add milk and seasonings and beat until well mixed.  In a well greased baking pan (mine is 13" x 9" x 2"), break the toast up into chunks (like 4ths or 6ths) and layer it across the bottom evenly, squishing it down a little as necessary. crumble the bacon slices across the top of the bread. Pour the egg mixture slowly and evenly across the whole pan. Now make an even layer of spinach across the top of that (or you could mix it in with the egg, I just thought it came out more even this way). Layer on the cheese, making sure to get it evenly distributed across the whole pan.  Cover the pan with foil (so the cheese doesn't get brown too fast) and put it in the oven. Bake for about 30 minutes, taking the foil off for the last five minutes.  Cooking times may vary, depending on the dimensions of your pan.  Test with a knife in the middle, it can come out a little moist, but not wet.  Serves 6 hungry people.

As you can see from the big chunk I ate right away, I was really hungry. Since I cut up my strata into 6 even pieces, I figured out the nutritional data calling that a serving.
Calories: 394
Protein: 34.8 g
Fat: 20.7 g 
Fiber: 8 g
Total carbs: 21 g

Enjoy!  


Thursday, May 24, 2012

Sucks Being a Skinny Bitch on a Diet

Not THIS skinny bitch...
I get it. Everybody who has ever dieted in their life (so, everybody in THIS country, at least) bitches about their diet. How hard it is. How they're not seeing results as fast as they want. How they just refuse to give up X (coffee, cupcakes, lard). Whatever. I feel your pain, I really do.
But I'll tell you one thing you other dieters have that I don't--sympathy. You see, I only weigh 109 lbs (as of this morning). My goal weight is 102 lbs, mainly because I've got this extra chunk-chunk around my waist, my jeans don't fit comfortably, and 102 lbs is a healthy weight FOR ME, as the entire span of my 20s and 30s has demonstrated.
You can stop looking at me that way. If I say I'm on a diet in public, I get this look like I'm some heroin-soaked has-been fashion model trying to relive her youth. I am not bulimic or anorexic, and I don't believe too many women's magazines. At the age of 44 (nearly 45), I have accepted that I have a tiny bust, a tiny pin-head, a huge nose, a somewhat funny-shaped face, and a husband who thinks I am one of the most beautiful women on the planet.  Quite honestly, it's that last part that is the reason why I'm on a diet. My husband and I are constantly challenging one another, supporting each other's efforts for self-improvement.  However, I'm afraid that while I was busy packing on my whole whopping 7 pounds, he has packed on considerably more. He loses some, then gains it back--it has been quite informative to watch the differences between women and men when it comes to weight loss. My husband can lose up to 5 lbs in a day, then a few days later, he gains that same amount back. Most of the women I've read about (I don't dare talk to them) do the same thing, but over much longer stretches of time. Sure, there's the diuretic loss of that first few pounds of water weight (I got rid of that a while back), but then it's just slow and steady. Except for me, where it's steadily nonexistent.
I have changed my whole life for this new healthy lifestyle, and, to be honest, my lifestyle wasn't that unhealthy to begin with! I exercised and ate a fairly balanced diet, along with the occasional trip to Carl's Jr. (Prime Rib Burger--you can never have too much meat). Now, I exercise a ton more, balancing stretching with aerobics and dance and weight bearing exercise. I eat a ton less. I am trying to get used to the feeling of being slightly hungry most of the time, and never feeling utterly stuffed.
So, with that in mind, I'm posting recipes, exercise, and lifestyle tips that have been helpful to ME, in the hope that they might be helpful to you. While my husband can live off of canned tuna and rice cakes, I'm just like every other woman (and most men) I know--I like variety and flavor, and sometimes I crave stuff that I just have no substitute for. Also, I sit in front of the computer on my ass instead of taking the dogs for a walk or trying out those 15 new exercises I pinned on Pinterest. A little bit at a time, I'm figuring it out, working it out, making the changes, and keeping it that way.
Just so you know, this blog post has been sitting as a draft for several days, during which time, I've finally managed to shave off a couple of pounds!  This morning, before breakfast, I weighed 103.8 lbs! Granted, then I ate breakfast with 2 cups of coffee, so I'm probably back up to about 105, but still, getting there!
My next post will be about some of the exercise regimes I've found--which exercises seem to do anything, and what they do.  It'll probably turn into a series of installments, since there's so many to choose from.  Walking fitness, butt-busters, abdominal workouts, oh, and then there's the exercises to help all the hurting joints I've injured trying all of this out. So stay tuned!
Also, if you  are at all intrigued by the colored pencil drawing of my Doberman Pincher, Mimi, above, you can buy a print of it for your very own in my Etsy Shop. Clicking on the link below the picture will take you right to it!

Tuesday, May 8, 2012

Spontaneous Cannellini Bean Soup with Lemon and Spinach--Healthy Food Porn

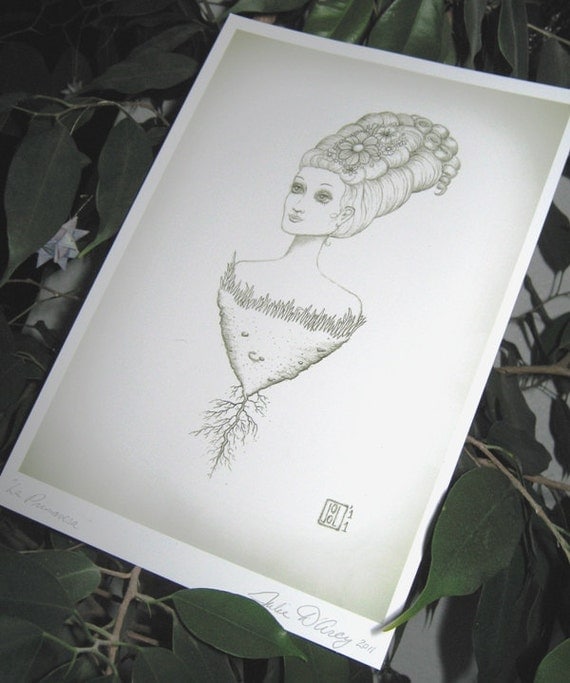
La Primavera--in honor of the veggies of Spring! 
Today I started out driving my honey to the airport for a 6 am flight, followed by some oatmeal with quinoa and apples, followed by going back to sleep. When I finally got up, I had a cup of strawberry Greek yogurt and a cup of coffee with 1/4 cup of non-fat dry milk and 1 T sugar-free French vanilla creamer (planning on cutting that source of corn-syrup solids out--more to follow). I took an inventory of the Costco needs and the regular grocery store needs, then decided to take a field trip to Sunflower Market to see about some good veggies and perhaps a substitute for the creamer.

Sunflower market was a big win today, as they had fresh kale!  At a price that I could afford to make soup at!  That made me pretty happy. Bought some fresh lemons, some farro (never tried it), some wheat berries (probably for bread, but we'll see), and some sea salt. I also perused the refrigerated coffee creamer section for some substitute for all the fat and calories in non-dairy creamer without having to resort to black coffee. I decided on So Delicious Coconut Milk Creamer in Hazelnut Flavor. I'm trying some in my sugar free hot chocolate right now, and so far, it's not bad. The real test will be tomorrow's coffee. Stay tuned.
Did my usual Costco run for stuff for the boys--they do frozen fish sticks and corn dogs (What the hell, it keeps them alive, and keeps them from complaining about my crazy health food.). Plus, I'll admit, their fish sticks are really good. The oldest keeps making them on the regular (not non-stick) aluminum foil, so if I happen to go out to the kitchen right after he's made some, he has usually left me half a fish stick stuck to the foil.
Next stop was the regular grocery store for canned beans and various beverages. They had canned Cannellini beans, as well as garbanzo beans (organic, storebrand, and on sale!), and Great Northern beans. So the house is all set to toot.
Got home with enough time to try out the Walking Boot Camp regimen I found on Prevention mag's site. Upside: it was pretty strenuous and a good workout. Downside: Could only take one dog, so now the other two are mad at me.  Got home and went to Zumba!
I ate pretty well today, but I also got a lot of exercise, so once I finally got home I was suitable famished. I had been thinking about some Cannellini bean soup that I think I saw on Giada at Home. Since I'm too lazy to look things up, I decided to just make something up.  So here's what I made up:
Someone else's white bean soup, I take terrible photos.

3 (15 oz) cans (drained) cannelllini beans
1 clove garlic, coarsely chopped
zest and juice of one whole lemon (it was a small lemon, so I added a little more bottled lemon juice to taste)
1 c. Chicken stock
1 c. filtered water

Threw all that in the blender and pureed it a bit. I don't think I completely pureed it, just got it pretty smoothie-like.
Threw that into a soup pot with a bit more water and stock until it looked soup-like and heated it on low. Added a teaspoon or so of dried basil and a pinch (or a few dashes) of ground cayenne pepper. Let it simmer while I took a shower (in case you skipped over the part about the Walking Boot Camp and Zumba class, I was gross.) Took a brick (10 oz.) of spinach out and plunked it in warm water (now that the blender is empty and needs rinsing, I thought I'd use that).
Once I finished my shower, I came out and stirred, tasted, added a bit of salt and cayenne to suit my tastes, then threw in the now-thawed brick of spinach (be sure to squeeze it out first). For some added protein and feeling of fullness, I added a 12.5 oz can of white meat chicken (Kirkland brand from Costco, I believe). If I had used veggie stock instead of chicken stock, I think you could call it vegan up to this point.

Overall, I have to say, it tasted as yummy as that picture above of someone else's soup. The spinach in that amount of beans made it slightly greener, but I'm always happy to have more spinach.  If I put my mind to it tomorrow, I'll figure out what the nutritional content is on that bad boy, because I bet it was pretty stunning.
So, yummy--check. Low fat--check. High protein & fiber--check, check.

Monday, April 30, 2012

Trying out Tophatter

Imaginary Flora, digital manipulation of old microscope photography
Upon the recommendations of Handmadeology.com, I've decided to try out this live auction site, Tophatter.com, as a venue to sell some of my artwork.  They only allow you to schedule one auction at a time when you are new, so it will be an interesting test to see if anyone is interested in my work.  My first piece up for auction will be a 6" x 8" print of "Imaginary Flora", shown above. It will be appearing in the Weekend Bazaar auction on May 6th at 12PM Pacific Daylight Time (1 PM Mountain Daylight Time, here where I am!). I hope that some of my friends will be able to show up and talk me up!  The starting bid will be only $3 + $2 for shipping! I usually sell this print for $15, so this auction could be a great deal for someone!

Sunday, April 22, 2012

The Mint is Dead, Long Live the Mint


Paisley-Face in mint, available in my Etsy Shop.


It is the destiny of mint to be crushed.
--Waverley Lewis Root


Apparently, Waverly has only crushed it, for he seems to have left out the part where the mint is more than happy to be crushed, as it knows it will simply grow back from where you have ripped it from the ground and strangle out the sturdiest of more delicate and desirable herbs. (In case you were wondering, as was I, who on earth Waverley Lewis Root was, I Wikipedia'ed him, and he was an American journalist for the Chicago Tribune and the Washington Post who wrote primarily about food. I'm sure if I could ever get any of my family or friends from Northern Virginia to read my blog, one of them would have probably known him. Alas, then I'd have to take the heat about writing a blog as the only non-professional-writer member of my family. Phhht, I say to that.)   


Who knew that a gift from my daughter's elementary school teacher a dozen years ago would still be reaching out to bitch-slap my garden all these years later, despite my attempts to kill it. 


Dear, sweet, Ms. Voge, the most beloved teacher a young girl (and her parents) could have, at the end of the school year, invited her entire class and their parents over to her house for a party. As a twenty-something nouveau-hippie, she grew her own veggies and herbs and raised bunnies in her vast back yard, and collected eclectic vintage and exotic furnishings for her little house.  As a gift to each of her students, and unwittingly making herself Patient Zero in this city-wide, minty contagion, she gave a single, tiny mint plant to take home.  Since I grew up a couple thousand miles Northeast of here, knowing how well it grows in Virginia, I took it home, expecting it to grow for a little while, at least as long as my daughter's attention-span at the time, then perish in the gruesome desert of the Southwest. Little did I know that that mint plant would spread across the area I had planted it in and send out little feeder roots to my entire back yard.
Both my son and I have gone through and ripped out any signs of mint-life to be found from under the cottonwood tree, where we originally planted it (don't get me started on what a noxious weed of a tree the cottonwood is).  I dug out the tiny roots that had infiltrated the dirt plot around the tree in order to grow something--really anything--I wanted, instead.
That was a couple of weeks ago.
Since I needed to treat the tree for disease this year, I decided to plant flowers there, since the treatment chemicals are not the sort of thing you'd want in your edibles. I gave it some yummy soil and some extra chunks from the peat pots my edible plants were in, and sowed a few marigold seeds.  
Oh, come on.
 I made sure that the flowers and garden plots got water, while the xeriscaped bricks around them got none.

Okay, seriously. F*ck you already.
 A few years ago, I did find something that gave the mint a run for its money, but it's hard to say whether it was a good trade-off or not.  As it turns out, another weed-disguised-as-aromatic-herb that seems to grow in every climate on earth (I'm not kidding--I saw it growing in a window box in a science lab in Dae-Jung, South Korea, which is climatically comparable to South Florida) is rosemary.  Now, I like rosemary in some dishes just fine, so I found it a lot more useful than the mint. However, a few months go by, and that rosemary had spread across everywhere!  It even seemed to duke it out with the mint and win! The fact that it also overgrew my basil and oregano, two herbs I like a lot more, was what really put the fear of Mother Earth in me. Not to mention the fact that rosemary grows on these sturdy, woody, pine-like stalks, that maintain their integrity even after death, during winter. Not good.


I seem to have been able to extract all the rosemary from years past. This year I bought ONE plant of rosemary, and I planted it next to my broccoli, as was suggested by my research about Companion Gardening, and it seems to get along okay so far.
Okay, Rosemary old girl, I'M WATCHING YOU.


So we shall see what the future holds for the battle of the noxious aromatic weeds delightful, fragrant herbs plotting against my garden. In the meanwhile, I think I might make up some prettier garden markers.
To end my tale of treachery, I'll leave you with this picture of my larger garden plot, complete with three different types of tomatoes, basil, and oregano.

Friday, April 13, 2012

Companion Planting: I Sure Don't Know Much About Plants

Dandelions attract pollinating insects and
promote fruit ripening. Mwah!
For someone with a Ph.D. in Biochemistry, or really, anyone with a degree that has "Bio" in the name, you would think I would know something about plant biology. However, I went to graduate school in a medical school, so my education might have been a little heavy on the animal part.  I basically know about plants what the dudes at Home Depot and Ace Hardware tell me, so that puts me up there with pretty much any adult who knows how to ask a question.
When I told my husband I'd gone out and bought seeds and some seedlings to plant this year, he gave me quite an earful on all the stuff I might do wrong, and how you can't plant some plants next to each other, or else they'll try and kill each other, or plot against you in a bid for global domination, or some shit. Once I felt thoroughly schooled in what I didn't know, I figured I'd seek out some knowledge about what to plant together and what not.
As it turns out, what he was mostly talking about was a concept called Companion Planting. The principles of companion planting have to do with how different plant species can help each other in different ways, including nutrient uptake, pest control, and pollination.   Some plants planted next to each other will cause both species to thrive, while other combinations of plants can be detrimental to one side or the other. Some plants repel specific pests (onions and other alliums repel aphids and slugs), so they should be planted next to other species that are vulnerable to those pests. For some reason I cannot seem to discover, you should not plant brassicas (broccoli, cauliflower, cabbages) near nightshades (tomatoes, peppers and potatoes), as they universally hate each other.  Since I am planting two relatively small plots in separate sections of my yard, and not planting a zillion different things across the vast farmland of America, I was able to divide and conquer, based on plant compatibility.
Some excellent resources I found were at Wikipedia (of course!), where there is a general discussion of companion planting, as well as a rather detailed list of plant compatibility, broken down into categories and giving the specifics of each type of harm or benefit (although no one seems to have an explanation as to why broccoli and tomatoes hate each other--bad phloem, I guess). 
The tension down here is palpable. Someone's about to get cut.
There's more handy information about companion gardening at How To Garden Advice.com, and they have their own groovy chart, as well as a graphic example of why you shouldn't plant chard and potatoes next to each other (if you have baby potatoes in the house, you might not want to let them look).
So, in case you're wondering what sorts of yumminess I have planned for the growing season, here's the plan for my two planting areas. In the smaller of the two beds, I'll plant the broccoli and cauliflower, along with sage and rosemary. That bed might fit some yellow beans as well, if they ever decide to germinate.  Then, all the way on the other side of the yard (are you hearing me, broccoli?) I'm planting TONS of tomatoes, along with Serrano chili peppers, basil, oregano, and flat-leaf parsley. For tomatoes, I got traditional Romas, some Super Sweet 100 cherries, and an heirloom called Black Krim. The Black Krim variety is from the Isle of Krim on the Black Sea, which I'm totally hoping is just like the land-locked desert of the Southwestern U.S.
Image from veggiegardener.com, click to read their article about the Black Krim!

If my peas germinate, they go in that box as well, though I may have to build some sort of wall of herbs between them and the tomatoes (I can't seem to get an honest answer from any of these sites as to the compatibility of tomatoes and peas.). Oh, and apparently, I need to plant those marigold seeds I got around both planters, as they give off all sorts of bad bug mojo. I will try and keep my readers apprised of how things are going over the course of the summer, with lots of pictures of the Doberman trying to steal tomatoes off the vine and getting zapped by the electric fence.
Tell me what your favorite homegrown vegetables and fruits are!  Are you planning on growing any this year?

Friday, March 30, 2012

Eggs Over Easy--Stop Making It So Complicated!

Last night, after making myself some eggs for dinner, I decided to do a quick Google search for how to make the perfect Over-Easy Egg. Like all things internet, there's more advice out there than anyone should know what to do with. And also, like all things internet, everybody says it's EASY. You just won't believe how easy. Easy-peasy... er, and something else that rhymes with easy. Trouble is, it's not that easy to flip over an egg without breaking the yolk. I mean, it's possible that it really is easy, and I'm just a f*ckwit, but, like everybody else who posts their opinions on the internet, I'm going to assume that it's not that.
As every single other advice article will explain (for very little reason), the insides of an egg has three parts: the yolk, the inner white (which goopily clings right around the yolk and cushions it from the heat), and the outer white (which is the part that sprawls across the pan if it can get away with it). Other advisors will tell you that you should simply monitor your egg until that inner white is firmed up and opaque, then, oh-so-simply-and-easily flip it over. This maneuver is mostly facilitated by copious amounts of grease, a non-stick frypan, a magical spatula, AND a lifetime of hand-eye coordination and practice. Sounds SUPER EASY so far, right?
Well, if you troll around some more through discussion boards and the Ask.coms and About.coms out there, there's usually a few still, small voices of reason peeping through the din out there. And now I'm one of them. Rather than peep, I'm going to shamelessly pronounce to everyone out there (all 5 of my readers) that I cannot flip an egg for nothing. Oh, sure, every now and again I get lucky and the flip results in one perfect egg, but certainly not if there's more than one egg in the pan.
So here's what I do, and it works, and it really is easy. Heat up your pan on a low to medium heat, spraying it with a little cooking spray (yes, even if it's a non-stick pan, eggs are the stickiest things on the planet!). I like to cook more whites than yolks (since I'm not that big of a fan of atherosclerosis), so my trick is to crack all of my eggs into a measuring cup first, so it can all go in at the same time and cook at the same rate. If you like to keep your eggs all segregated from one another, well, that's between you and your egg maker, and you'll just have to figure something out. Mostly, I just use the spatula at the end of cooking to separate the blanket of whites into my eggs and The Honey's eggs. In my example, I was just cooking for myself, so the whole thing went onto my plate (The Honey is out of town... :-( ...).
Once your pan is heated up and your eggs are all cracked and/or separated (for my example, I just used one whole egg and one white), pour your eggs into the pan. Some sources say that it shouldn't be so hot as to make the sizzly, crackly sound when it hits the pan, but mine does, and nothing bad ever comes of it. Have a big enough pan for your eggs to spread out nicely--it'll ensure that they cook evenly and make it easier to separate, if you decide to share. So now, while you let it cook on one side for a few seconds (say, 30-ish?), add any seasonings you may want on your eggs. I put a little salt, freshly ground pepper, and a sprinkle of onion powder.

Sizzle, crackle, pepper-grinder-noise, salt-shaker-shake...

Now here comes the magically easy part: Put a lid on it. I chose a lid that is smaller in diameter than my pan, but not so small as to touch the eggs themselves. That way, I have neatly enclosed my eggs so they can steam for a few seconds. If you only have a properly-fitting lid, that works too, but your eggs might need a few more seconds, as now you have a bigger steam-chamber to heat.

Looks funny, works like a charm

So now you stand there for a few seconds (again, like, 20 to 30 maybe?), eating your bacon first (shut up, everybody does it), buttering your toast, or toasting your tortilla on the adjacent burner (advanced maneuver--I have never succeeded in doing these two things at once. Either the eggs or the tortilla pay the price for my insolence.). Now peek at your eggs and see if they are done, which they probably are! Now you only have to get them from the pan to the plate without breaking the yolk, and that I can't help you with. Use a spatula. You'll be okay.

Perfect egg, jiggly photo.

So, like everything in life, this takes a little practice. However, you must admit, this is pretty easy, compared to flipping the eggs over! The only real variable is cooking time, and that, I'm afraid, just takes practice. Nowhere near the amount of practice it would take to master the Alton Brown Flip-in-the-Air method (my dogs would really appreciate all the failed attempts, though, unless it all wound up on the inside of the fume hood), but practice. And, unlike Alton's outtakes, my errors are probably still edible and free of dog fur.
Oh, and yes, I am aware that these eggs really aren't Over Easy, since you haven't actually flipped them over. Either stop being so pedantic, or make up a catchy new name for this type of egg yourself. Short answer: Shut up and eat your eggs before they get cold.
Also, if you enjoy the sunny image at the top of the post, it is my artwork! You can go purchase it, in ACEO-size or 5" x 7" size, in either my WePAY store (5" x 7" is on page 2) or my Etsy shop. I hope the rest of your day is truly Over Easy! (No spatula required!)

Wednesday, March 28, 2012

Food Porn! Okay, Not Really...

Tonight's post is in response to all the Food Porn pins I've been making lately on Pinterest. Ever since I started attempting to lose a few pounds, every time I see some yummy, indulgent, nutritionally-worthless food pin, I indulge in it for a few seconds, then pin it to my Food Porn board. I've even gotten to the point where I find yummy-but-healthy food links and pin those on in there, too. Tonight at dance class, one of the other dancers (who also follows my pins on Pinterest) told me to please stop pinning Food Porn late at night, which I was totally guilty of, and it was doing me utterly no good either. So, tonight, once I got home (ravenous after dance class, of course), I decided to make some food just for me. It started looking pretty promising, so I'm recording what I did here, and if it is as good as I think it might be, I'll not only publish this blog post, but pin it to the Food Porn board! (Right now, I'm scurrying back and forth, two dogs in tow, between the kitchen and the computer to check on the food.)

It's important to drop food on the floor while cooking, the voices in my head tell me.

So tonight's impromptu recipe is Curried Quinoa with Chicken!
In a smallish saucepan, measure out 1 c. Bob's Red Mill Quinoa (because it's already rinsed, otherwise, go rinse the quinoa) 1 c. water, and 1 c. chicken stock. Turn on the heat (medium-high-ish) and start adding some seasonings. I added about 1.5 Tablespoons of curry powder, 1/4 teaspoon (couple big shakes) onion powder, a delicate shake of garlic powder (whatever that means), a couple shakes of ginger powder (grated fresh ginger would be better, but whatever), a sprinkle of dill or lemongrass (I found the lemongrass bottle first), and salt to taste. Cut a lemon in half and squeeze that sucker in there, too (I used about 1/4 a lemon, as it was this insanely huge, Palm-Springs-grown lemon from my friend Lisa, who runs a lovely Bed and Breakfast here, and is a much better cook than I am.) If you happen to feel so inclined, you could also zest a bit of the lemon zest in there for good measure. I decided to slice up a carrot (very thinly, so it would cook quickly) and dumped that in there so it could cook with the quinoa. Now that I think about it, I also added a teaspoonish squeeze of Blue Agave at some point as well. Stir it up and let it reach a boil, then turn it down to simmer, cooking for 12 or so more minutes. Once it has cooked for that amount of time, turn it off and put the lid on it to let it swell up.

I wasn't kidding about the big freakin' lemon

While it's simmering (and almost done, really), get out a small saute pan and spray a little cooking spray on it. Open a can of chicken breast (or if you want to be all fancy, cook yourself up some chicken by method of choice) and drain the water off. Dump the chicken into a small mixing bowl, then add to it a couple teaspoons of curry powder, salt and pepper to taste, and a little drizzle (let's call that a teaspoon or two) of Blue Agave nectar (or honey, if you want). Mix it together with a fork, breaking up the biggish chunks of chicken into manageable chunks. Now throw that into your pan and saute it up until it is warmed up and you've got a little browning going on.
By now, your quinoa is all fluffy, so all you need to do is toss everything together, and enjoy!
Here's a horrid picture of my result!

We all know it's the ugliest food that tastes the best.

The end verdict is that is was pretty tasty! I added a bit too much salt, so, you know, don't do that and you should be okay. It would have been good with a sprinkle of raisins in it, but I'm out.

Friday, March 9, 2012

Lovely Giveaway of Vintage-Style Jewelry!

I was just looking through Facebook, when I chanced upon one of the many giveaways. Mostly, I do not find them interesting, but this jewelry designer has some rather lovely styles! For my entry into the drawing, I had to choose my favorite necklace, and it was very difficult! Take a look at some of these choices:


Have I posted too many good choices? It's ridiculous to try and choose, right? Personally, I chose the coral and white one, but if I win, I might see if I can change my mind to the top one with the black and white swirly beads. As I said, tough choice!

Go here for all the rules on how to enter! Artistic Blend Designs Vintage in Color Giveaway!

Wednesday, February 15, 2012

The 30 Day Drawing Challenge Continues!

So when we last spoke of the 30 Day Drawing Challenge, I was all caught up to Day 10, Favorite Candy. Next came "Turning Point in Your Life". That one threw me a little bit, for I do sort of feel as if my life has been something of a smooth, rolling lumber from one inevitability to the next. Well, okay, not really, but it's not like fraught with Aha! moments or anything either. Plus, honestly, I was kind of tired over the weekend and didn't feel like drawing anything. So I snoozed on through Saturday and Sunday and utterly didn't draw anything.
Early Monday morning, a flash of inspiration hit me for my turning point. Back in July of 1996, before I moved to Albuquerque, I drove down here from Rochester, NY, to see the place and see if I could find a job. At night on Interstate 40 coming across Eastern New Mexico, there's a whole bunch of frigging nothing. Then you start meandering through the mountains east of the city of Albuquerque, and at some point along the road, you come up over a crest, and the utter nothing turns into a vast sea of city lights. Well, okay, I'm from Back East, so I've certainly seen more lights in one place than that, but it still makes quite an impression as you come up over the crest and can see for miles, and, all of a sudden, there's something to see. It made quite an impression on me, and little did I know what a turning point in my life it would be. I moved here and have been here ever since.
It was a fine idea, I thought. I could execute it on a piece of black paper with colored pencils, it would be somewhat abstract looking, yet representative of my memory of the event. It was a done deal. Except, I forgot.
So anyway, here's a lousy drawing of my house, the first and only house I've ever owned.


I made it pretty small, so you wouldn't be too disappointed.
Day 12 of the challenge was "Most Recent Accomplishment". I had been thinking about drawing my newly painted kitchen, but the thought of drawing my kitchen bored me for some reason, so I picked something else. I picked getting a new hairdo.


Yeah, I know, as actual accomplishments go, getting a new 'do doesn't really rank, but I'm the sort of person who gets the split ends cut off twice a year for years, then once every five or so years decides to spend WAY too much money getting highlights done, but always really natural-looking highlights with colors that look like my hair probably used to be that color at one time. Well not this time, Bub. This time I wanted something fun and different and not natural-looking THAT PEOPLE WOULD ACTUALLY NOTICE. So I went with deep mahogany low-lights with kind of magenta-like highlights. Not so much that it was too crazy, but enough that people could see I was taking a chance. It came out absolutely beautifully, thanks to a lovely gal named Emerald at the Trilliant Salon over across town. I like it so much, I might even go back and have her touch it up (or even ADD MORE COLOR) once it grows out some.
Day 13 of the challenge was "Comic", and at first, I wasn't really sure what that meant. Like the Sunday Funnies, that kind of comic? Or draw a stand-up comedian? I thought for a little while of drawing a comic strip of my Facebook Friend who's a comic, Erik Bergstrom, telling one of the jokes he posted on Facebook, but that started getting too complicated, so I just started drawing some comical dude. He turned into a somewhat creepy comical dude, so I labeled him "My Creepy Valentine".


Of course, he's not my actual Valentine--my real Valentine is awesome and adorable. This guy is the Valentine for that self-absorbed someone who just can't seem to find a guy who will accept her for how wonderful she really is. Don't fret, girl, I'll give him your number.
Well now it's getting late and I'm really starting to talk out of my ass, so I should probably wrap this up.

Tuesday, February 14, 2012

Happy Valentine's Day!

I do hope you are all having a lovely Valentine's Day! I decided this year to have a Zombie-hunting theme to my Valentine's gift giving. My Valentine's card is from noncomposcards on Etsy, created by the hilarious and talented Erin Appledale, author of an ACTUALLY ENTERTAINING (as opposed to what I'm doing) blog, here.

To save space, I'll give you the punchline on the inside--it says, "If I were a zombie, you'd be the first to die."
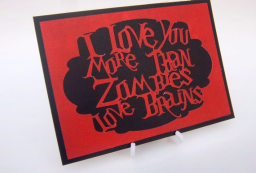
Right after I found that, I chanced upon a fellow WePAY shopkeeper who was offering up some pretty awesome, hand-cut signs, one of which looked like this:

I thought this was pretty romantic, so I had to buy that as well. You can get your own sign, or other nifty items, like etched glassware, in Desolation Allie's WePAY store.
The last part of my Valentine's gift we're just going to have to agree to pretending like it goes with the theme, which it might, if you consider the realm of Zombie hunting or Post-Zombie-Apocalypse survivalism, or something. I was on Groupon (totally addicting, by the way), and they had an online deal on some Night Vision Recording Stealth Goggles, and I knew I had to buy them immediately. I figure, if nothing else, my husband can finally find Bigfoot, and put the whole issue to rest already. He'll have a carcass to the local Game and Fish by the end of the month.
For anyone following along on my 30 Day Drawing Challenge, I'll get back to that tomorrow. I've been keeping up with it, just needed a break for today.

Friday, February 10, 2012

Finally Caught Up, Just In Time For A Hard One

So, the past few days I've been blogging about the 30 Day Drawing Challenge, looking at other people's works, beleaguering myself with the choices for each day's challenge (oh, such problems I have!). One of my fellow participants, artist Megan Mars, hasn't been posting to the same group I have, but has just been posting it to her Fan Page. When she posted her most recent entry, it occurred to me that I hadn't actually checked to see if we were using the same list. As it turns out, we weren't. So since I believe I used her list for my very first post (and it shares the first few challenges in common), I suppose I should post the list that I am actually going from myself.


I was a couple days behind, but I think I've caught up. Yesterday, I managed to finish and post Day 8, Favorite Animated Character. I have loved Looney Tunes' Wile E. Coyote since long before I ever moved to the Southwestern Desert. Having built almost my entire preconceived knowledge base of the desert on watching Wile E. and Road Runner, I have to say, living here now, I got it pretty much correct.


Day 9 was "Favorite TV Show", which is another thing that changes every few years. Some runners-up included "Supernatural", "Buffy the Vampire Slayer", and "The X-Files", but as far as the TV show that I currently can't wait to see in my Tevo lineup each week, I had to go with the BBC/SyFy Channel series, "Merlin". It's a true escape from real life, present day, and, well, historical or literary accuracy. I think it's really sweet.

Plus, I got to pretty much make up the sword from thin air--Excalibur hasn't really made much of an appearance on the show yet. This drawing was all in graphite except for his blue eyes, which were colored pencil.
Day 10 was "Favorite Candy" and that was pretty easy. According to my Dad, my first word wasn't "Mama" or "Daddy", but "emmanem".


I only drew one, 'cos I'm on a diet. But the red ones are the best.

Today is Day 11, and the challenge is "Turning point in your life." I've had quite a few turning points, so that will require some thought. I guess you will just have to wait and find out.

Thursday, February 9, 2012

More 30 Day Drawing Challenge!

I'm a few days behind in the 30 Day Drawing Challenge, but not as far behind as I am at this blog! I told myself I was going to get back to it, and by gosh, I am!
So when we last spoke, I was on Day 4's challenge on Day 5. I did finish Day 5's challenge that evening, just didn't blog about it. Day 5 was "Best Friend", and I used a photograph of my honey as the model, as my actual husband was all scruffy-faced and Don-King-haired on his day off all day.

This is one of the few shots I have of my husband smiling. Not that he doesn't smile, he just doesn't do so on purpose for the camera. Cute puppy, Troy, appears courtesy of our daughter's boyfriend.
Day 6 was "Favorite Book", and I had a good amount of trouble thinking of one for this, too. I'm not exactly a bookworm, but not exactly illiterate; I was just having trouble with the superlative nature of the word "Favorite" again. Then, I thought, what book do I use, go back to and enjoy the most?
Yeah, I know, I'm a word nerd. Plus, sheesh! Two days in a row of pencil and shading! Seriously, ENOUGH, for a minute, anyway.
Day 7's Challenge was "Favorite Movie", and I won't bore you with how difficult a choice that was, but, again, I went with my heart, and not what I thought would make me look good or whatever, and picked the movie that still seems as good today as it did when I saw it on some fuzzy Baltimore station on a little Black & White TV.

I went back and watched some clips of "Yellow Submarine" on YouTube, to get an idea of some of the shapes and colors, and it was just as much fun to watch! I was dorkily quoting dialog the whole day, which, out of context, makes even less sense than in context.
I'm all caught up(ish) to yesterday's challenge, "Favorite Cartoon Character", which I'm putting the finishing touches on. I decided that, although color is bold and fun and all, shading is really what I'm better at. Plus, I thought it'd be fun to create a shaded cartoon character from a flat, outlined image. As soon as I finish that, I'll only be a day behind (which, as I mentioned, is better than I've been doing at blogging).
So, is anyone else out there doing this challenge? What other challenges are out there that people are participating in? I had found a fellow artist doing a 28 Days of Faces challenge for the month of February, which looked like a lot of fun, and, had I seen it first, I probably would have picked that one instead. I love creating faces!
Feel free to leave a comment and tell me all about your mid-winter creative endeavors!